Prompt Guidance
How to Make a Blurry Picture Clear with Ottermind
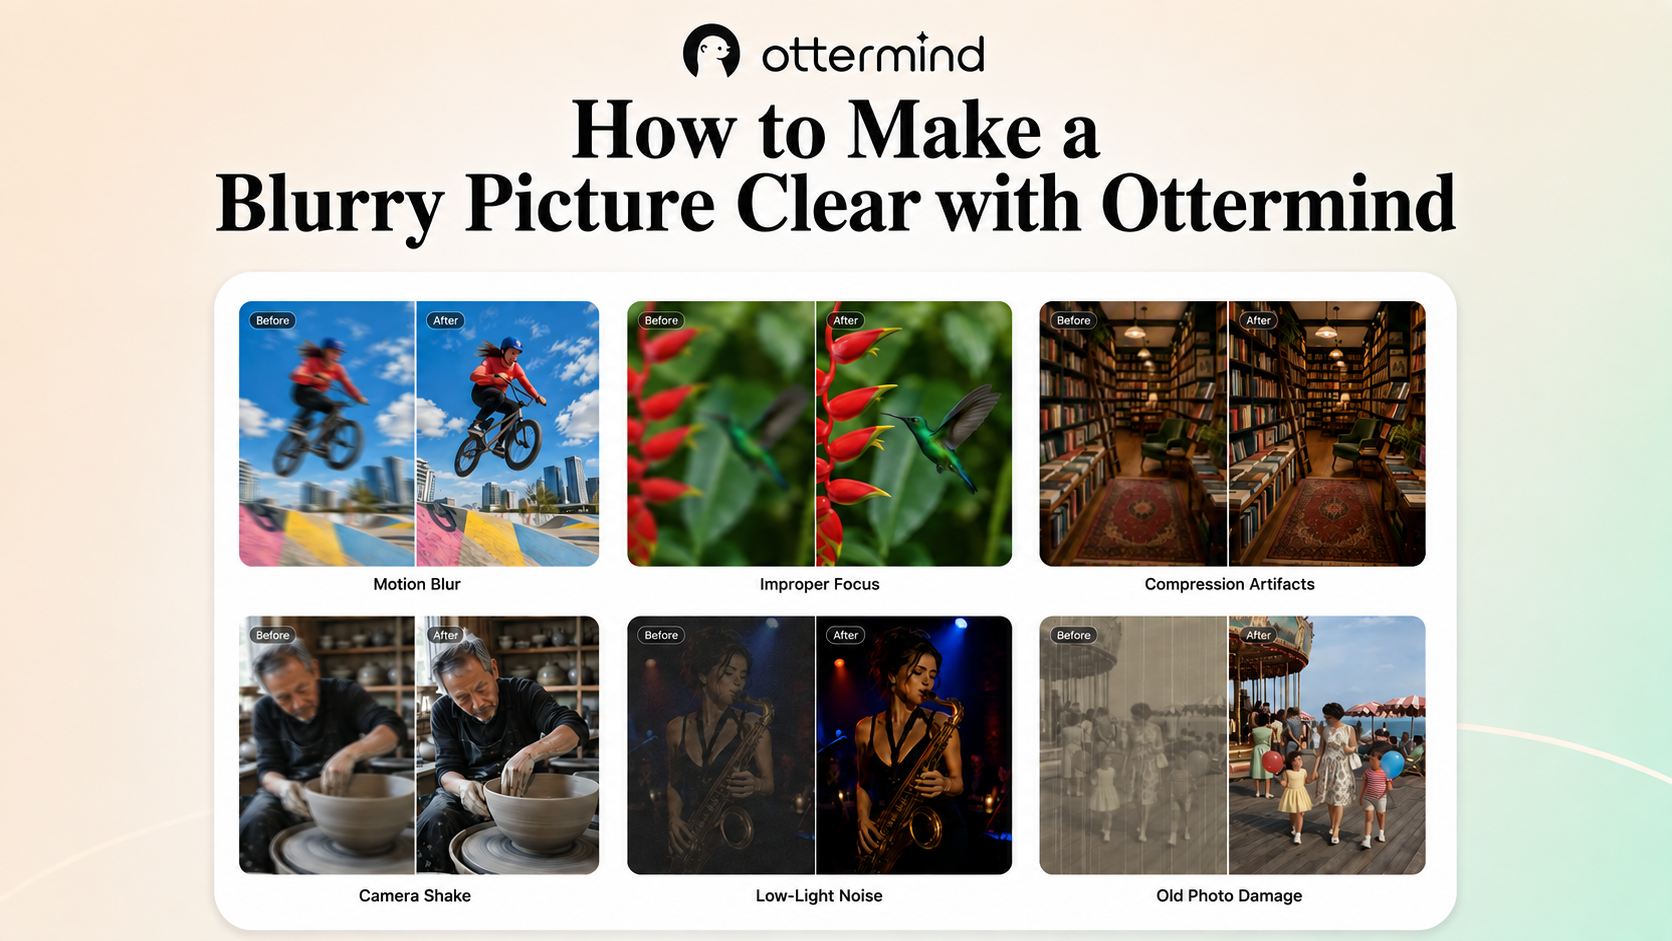
Making a blurry picture clear is not one edit. You may need to correct camera motion, strengthen weak edges, reduce low-light noise, remove compression artifacts, or enlarge a small file. The best result starts by choosing the right job instead of asking an AI tool to “enhance everything.”
This guide shows how to inspect the photo, write a useful image-repair brief, run it in Ottermind, and decide whether the output is accurate enough to keep. It also explains when a reshoot or a better source file is safer than AI reconstruction.
Research note: This article was researched on August 20, 2026. Technical references include Adobe's sharpening overview, the OpenCV out-of-focus deblur tutorial, Real-ESRGAN, and SwinIR.
What “make this picture clear” can mean
Four operations are commonly grouped under image enhancement, but they solve different problems.
| Operation | What it changes | Best used for | What it cannot guarantee |
|---|---|---|---|
| Sharpening | Increases contrast around existing edges | Slight softness after capture or resizing | Recovery of detail that was never recorded |
| Deblurring | Estimates a less-blurred version of the image | Mild camera shake, subject motion, or missed focus | A factually exact reconstruction |
| Denoising | Reduces grain and color speckles | Photos taken in low light or at high ISO | New subject detail beneath severe noise |
| Upscaling | Adds pixels to increase dimensions | Small images needed for larger display or print | Automatic correction of motion or focus errors |
Adobe describes sharpening as increasing contrast where tones meet and warns that it cannot restore missing detail or repair genuinely out-of-focus areas. OpenCV describes deblurring as estimating the original image. That word, estimating, matters: a cleaner result may include calculated or generated information rather than recovered evidence.
Modern restoration research combines several of these tasks. SwinIR addresses super-resolution, denoising, and JPEG artifact reduction. Real-ESRGAN focuses on complex real-world degradation where the exact cause is unknown. These systems can produce useful visual improvements, but no method can prove the content of pixels that were never captured.
Diagnose the photo in 30 seconds
Inspect the image at 100% zoom and answer these questions before editing:
- Is there a sharp area anywhere? If the background is sharp but the face is soft, focus landed in the wrong place.
- Do edges trail in one direction? Parallel streaks often point to camera shake or subject movement.
- Are dark areas grainy? The main problem may be noise rather than blur.
- Do edges look blocky or ringed? A small JPEG or repeatedly shared image may be heavily compressed.
- Is the file simply too small? Check pixel dimensions rather than judging by the word “HD” in a filename.
- Which details can you independently verify? Faces, lettering, logos, product features, dates, and prices deserve extra caution.
If several problems appear together, solve the most disruptive one first. For example, remove strong noise before judging edge sharpness. Correct visible blur before deciding how far to upscale.
How to make a blurry picture clear in Ottermind
1. Bring in the least-damaged source
Find the original camera file, full-resolution download, or highest-quality scan. A screenshot of a compressed social post has already discarded information. If you have several near-identical shots, compare them before choosing one; another frame may contain a sharper face or cleaner text.
Keep the original untouched. Use it as the factual reference throughout the task.
2. Define where the image will be used
The destination changes the standard for success. A 320-pixel profile image, a marketplace product photo, a presentation slide, and an 8 × 10-inch print do not need the same dimensions or edge strength.
Write down:
- Final use and approximate display size
- Main subject
- Type of blur or degradation you observed
- Details that must stay unchanged
- Changes that are acceptable
- Areas where invention would be harmful
This gives Ottermind a real completion target instead of an abstract request for “better quality.”
3. Open the image task and write the repair brief
Go to Fix Blurry Pictures in Ottermind, add your source, and describe the repair in one compact brief.
Use this structure:
Goal: Prepare this image for [final use and size].

Observed problem: [camera shake / missed focus / noise / compression / small source].

Improve: [subject or region that needs work].

Preserve exactly: [identity, pose, product shape, logo, text layout, colors, lighting, crop].

Avoid: [invented text, changed facial features, new objects, halos, plastic texture, excessive sharpening].
The brief does not need photography jargon. It needs a clear subject, a visible problem, and boundaries.
4. Choose a prompt for the image type
For a portrait:
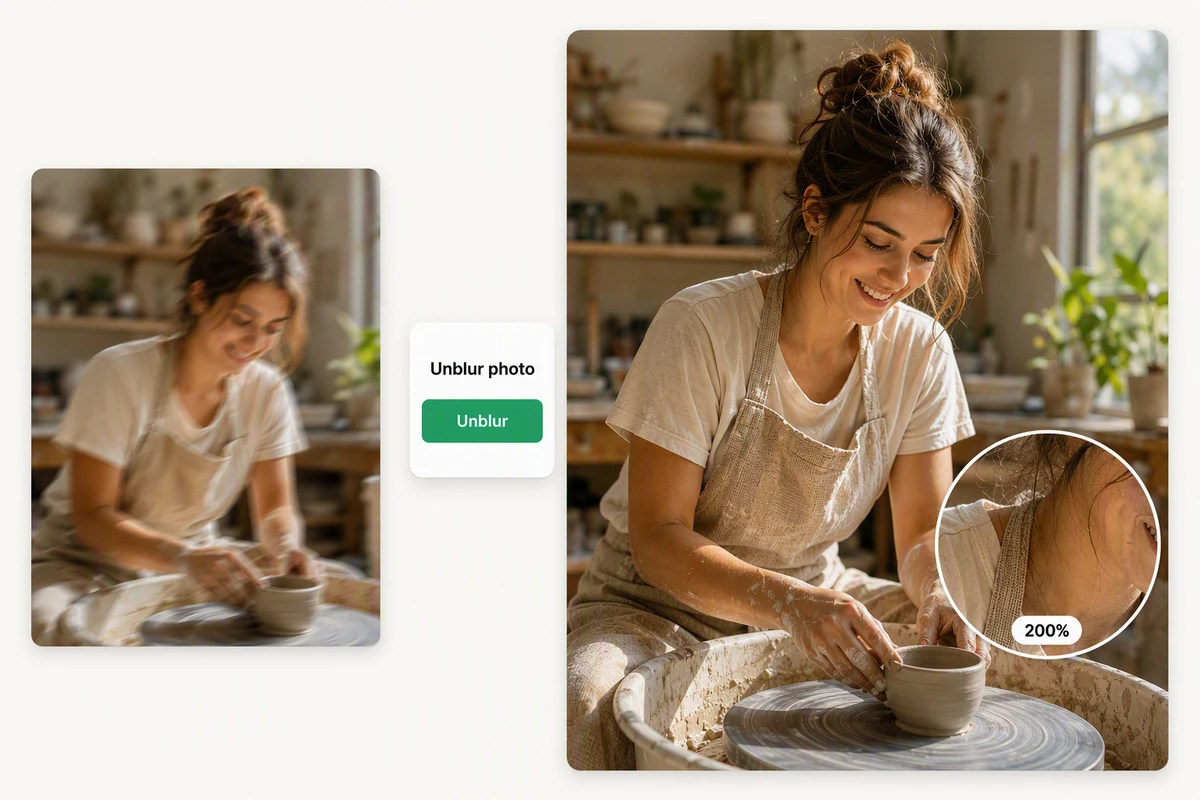
Prepare this portrait for a 6 × 4-inch print. Reduce the mild camera shake around the person while preserving their identity, expression, age, clothing, and pose. Keep the setting and lighting unchanged. Do not add facial detail that cannot be supported by the source.Use a natural portrait comparison like this as a review reference. Check identity and age before judging smoother skin or stronger detail.
For an ecommerce product photo:
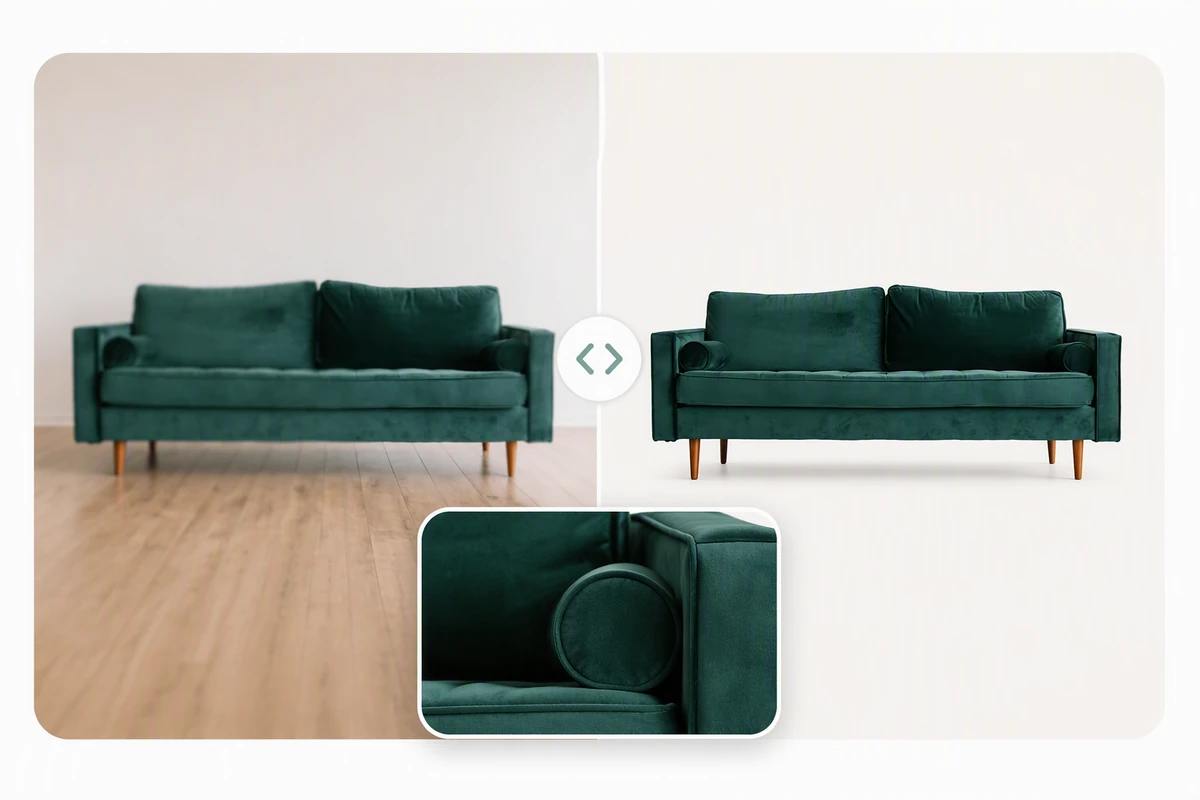
Prepare this product image for a 1600-pixel-wide listing. Improve the edge clarity of the bottle and reduce compression artifacts. Preserve the bottle geometry, cap, glass color, reflections, logo placement, and label layout. Do not rewrite unreadable label text or change the background.For product work, use a side-by-side reference to inspect silhouette, materials, repeated patterns, and small construction details.
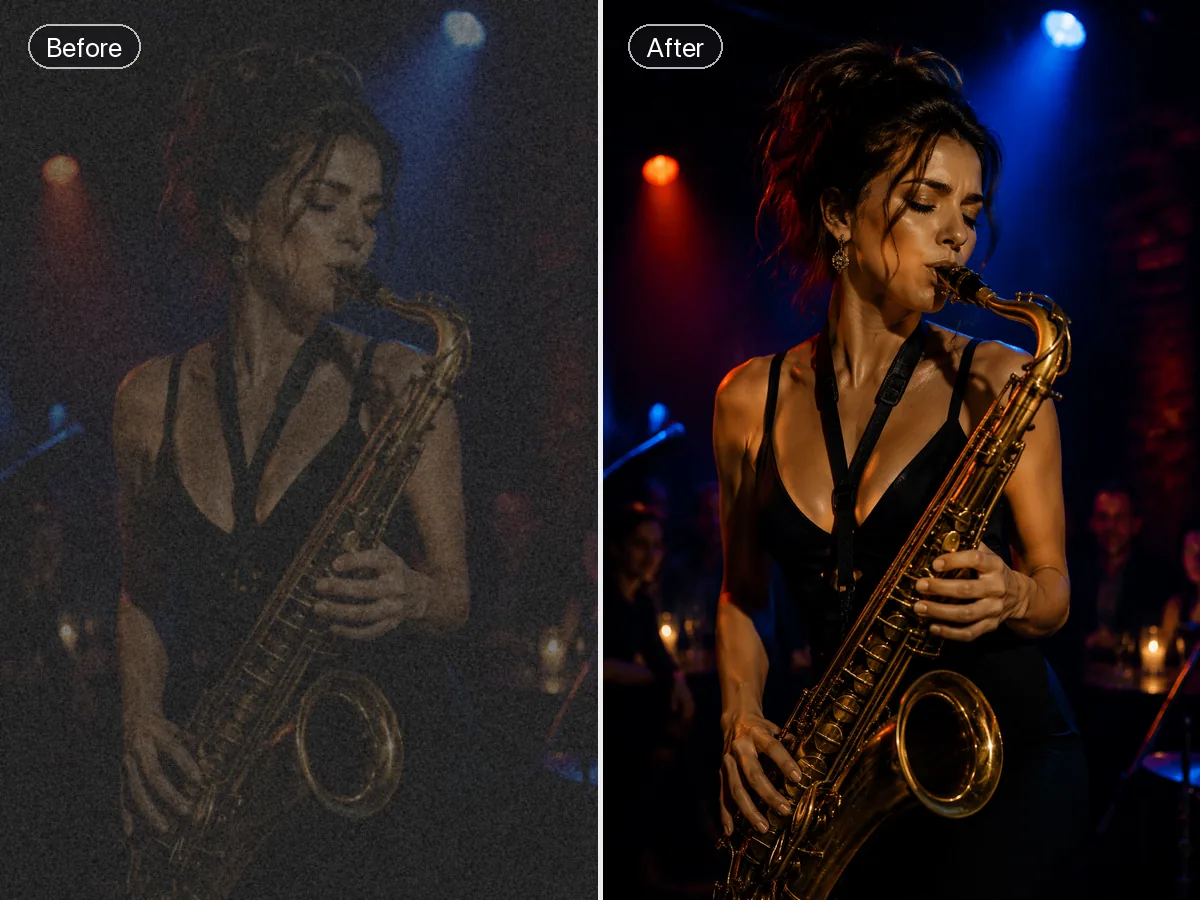
For a low-light event photo:
Make the main speaker easier to see at presentation size. Reduce color noise in the dark areas before applying restrained clarity to the speaker. Preserve the stage lighting, face, clothing, microphone, and audience. Keep the background naturally softer than the subject.Low-light review should preserve the atmosphere rather than flatten every shadow. Compare the accepted image at screen size and in its intended print or presentation context.
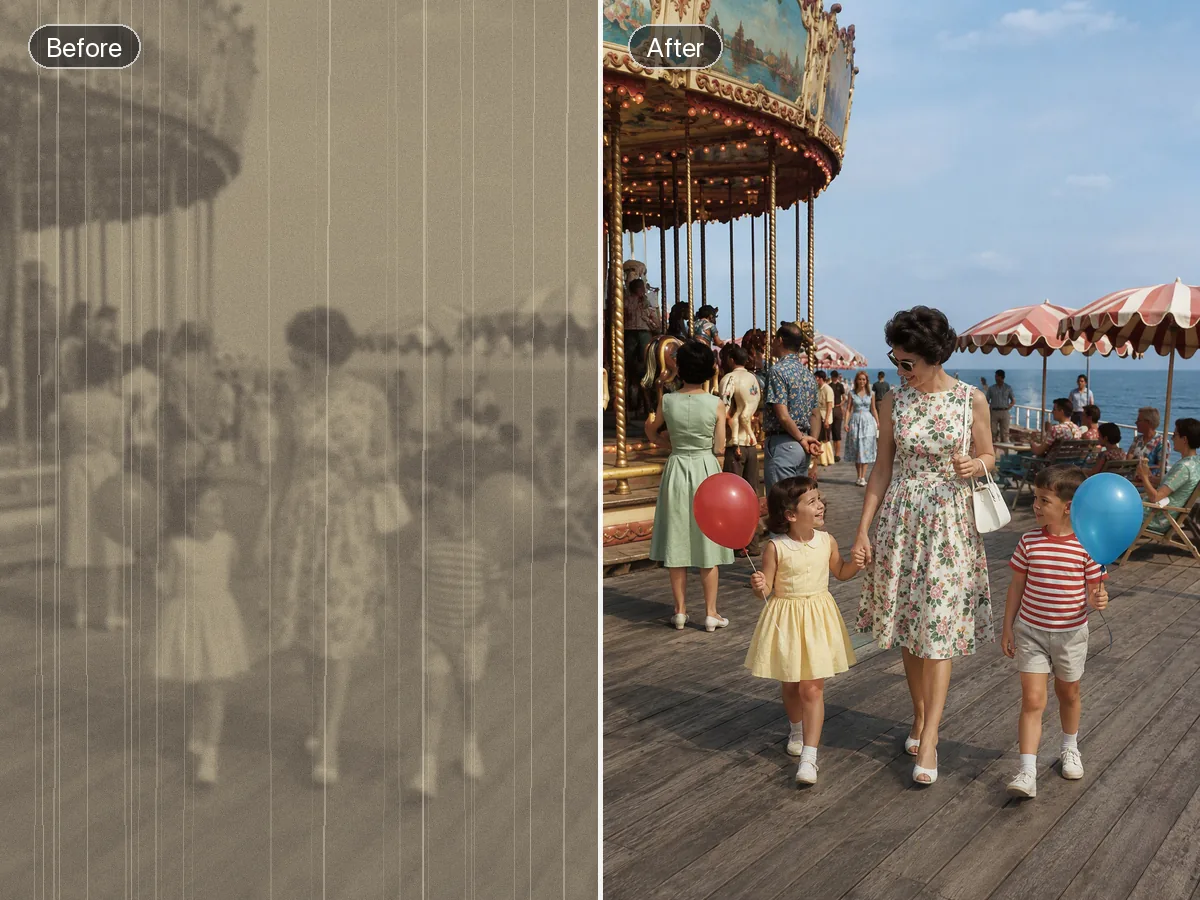
For an old scanned photo:
Create a conservative cleanup of this scan. Improve the overall legibility and reduce mild softness while preserving the original monochrome tone, faces, clothing, objects, and framing. Do not colorize, replace the background, or reconstruct uncertain facial features.An old family snapshot needs a visible source comparison. Keep changes narrow, preserve period details, and retain an untouched archival copy.
5. Review at two zoom levels
First view the output at the size where people will actually see it. This reveals whether the edit improves the practical use of the image. Then inspect important details at 100% zoom.
Use this review scorecard:
| Check | Pass condition | Reject when |
|---|---|---|
| Subject clarity | Main subject reads more easily at final size | Improvement exists only at extreme zoom |
| Identity | Recognizable features match the source | Eyes, mouth, age, expression, or face shape changed |
| Product accuracy | Shape, materials, controls, and branding agree | Seams, labels, reflections, or geometry were invented |
| Text | Legible characters match another reliable source | The output guessed letters or numbers |
| Edge quality | Transitions look natural | Bright halos, double outlines, or crunchy edges appear |
| Texture | Skin, fabric, hair, and surfaces remain believable | Texture looks waxy, repetitive, or synthetic |
| Background | Existing context remains stable | New people, signs, objects, or structures appeared |
An output can look more impressive and still fail this review. Choose the version that preserves the source, not the version with the most visible texture.
6. Revise the smallest possible area
If one region fails, keep the accepted parts and name the exact correction.
Keep the accepted crop, lighting, faces, clothing, and background. Reduce only the bright halo along the left side of the subject's hair. Use a softer edge transition and do not change facial detail.Keep the accepted bottle shape, color, reflections, and background. Return the label area to the source layout. Leave unreadable characters soft instead of generating new text.Small revisions are easier to compare and less likely to disturb a good result.
7. Save a master before resizing or styling
Keep three files together:
- The untouched source
- The accepted clarity master
- The final export for web, print, or presentation
If the accepted master needs larger pixel dimensions, continue with the HD Photo Converter as a separate task. Separating clarity correction from resizing makes it easier to identify which operation introduced an artifact.
Adobe's current resizing documentation also distinguishes resizing from resampling: resampling changes the number of pixels, while changing print resolution without resampling does not add image data. Set the actual destination before choosing output dimensions.
Resolution reference: See Adobe's explanation of printed image resolution and resampling options.
Should you repair, replace, or reshoot?
AI repair is not always the best use of time. Use this decision table before running repeated revisions.
| Situation | Best next step | Why |
|---|---|---|
| Mild softness in a personal photo | Repair and review | The source still contains recognizable information |
| Product photo with readable branding | Repair conservatively | Accuracy can be checked against the physical product |
| Product photo with unreadable label | Reshoot or use another source | Guessed wording can mislead buyers |
| Tiny face in a wide scene | Use another frame if available | Too little identity information remains |
| Creative social background | Repair or replace creatively | Exact documentary detail may not be required |
| Legal, medical, forensic, or historical evidence | Preserve the source and seek specialist review | A plausible reconstruction is not evidence |
| Repeatable studio setup | Reshoot | A clean capture is usually faster and more reliable |
The threshold is simple: the more important factual accuracy is, the less freedom the restoration should have.
Common mistakes that make the result worse
Asking for “8K” without a destination
Pixel count is not the same as recovered detail. Name the final width, print size, or viewing context instead.
Combining repair and redesign
Removing blur, replacing the background, changing the lighting, retouching skin, and restyling the image in one request makes errors difficult to trace. Approve the repair first, then start a separate creative edit.
Sharpening every part equally
Real photographs contain depth. If the subject, distant background, skin, fabric, and sky all receive the same hard texture, the image can look synthetic.
Trusting newly legible text
Generated letters can look convincing without matching the source. Verify names, prices, dates, safety warnings, and product claims independently.
Replacing the original file
Never make the enhanced export your only copy. The source is the reference that lets you identify drift and try a different method later.
Prevent blur before the next photo
For future captures, a stable camera and an appropriate shutter speed provide better information than any repair process. Nikon's photography guidance identifies movement of the subject or camera as major causes of blur and recommends stable camera handling, a tripod, or image stabilization where appropriate.
Practical habits include:
- Clean the lens before shooting.
- Add light instead of relying on aggressive noise reduction later.
- Hold the camera with both hands and brace your elbows.
- Tap or select the intended subject before capture.
- Use a faster shutter speed for motion.
- Take a short burst when expressions or movement change quickly.
- Use a tripod and timer for product photos.
- Keep the original file instead of only a messaging-app copy.
Capture reference: See Nikon's guide to holding a camera for sharper, more in-focus pictures.
Frequently asked questions
Can AI completely fix any blurry photo?
No. Mild blur and degradation may improve substantially, but severe motion, missed focus, clipped light, blocked shadows, and tiny subjects can leave too little reliable information. AI may create a plausible replacement rather than recover the original detail.
Is sharpening the same as removing blur?
No. Sharpening increases edge contrast. Deblurring estimates how an image might look with less camera, subject, or focus blur. Upscaling changes pixel dimensions. A photo may need one or several of these operations.
What is the best prompt for making a photo clear?
The best prompt names the final use, visible problem, main subject, details that must remain exact, and artifacts to avoid. A short, image-specific brief is more useful than a long list of generic quality words.
How do I know whether AI invented detail?
Compare the output with the untouched source and another reliable reference when available. Pay close attention to faces, lettering, logos, repeated patterns, product geometry, and small background objects.
Should I remove blur before upscaling?
Usually, yes. Approving the clarity correction before increasing dimensions makes the workflow easier to evaluate. If the main issue is only a small but otherwise sharp source, upscaling may be the primary task.
Start with one photo and a verifiable goal
The most useful image repair is not the sharpest possible output. It is a result that works at the intended size, keeps important details stable, and makes every uncertain area easy to identify.
Choose one source photo, define its destination, and open Fix Blurry Pictures in Ottermind. Use the repair brief above, compare the result with the original, and stop when the image is clear enough for its real purpose without pretending that missing information has been recovered.